How to build a planter
For your rooftop garden you’re going to need something to hold your plants and soil mixture. For our project, we constructed 3’x3’ planters to enable us to implement the square foot gardening method. The sides are 1”x8” pine and each planter has a base made of plywood.
First, cut all wood to size. We asked our local Home Depot to do this for us for the sides and plywood bottom because they did not fit into our car. This is a great option for anyone who doesn’t have the space or tools at home to do this step easily and safely.
We used size #8 x 2” wood screws to connect the four sides in a pinwheel pattern.

(photo taken from All New Square Foot Gardening 2nd Edition)
Pinwheel patterning is when you overlap each board until you make a complete square. The holes for the screws were first pre drilled with about a 1/16 size drill and then the screws were placed.

However, after filling the first prototype box with soil, the pressure became too much and started splitting the corners and wood around the screws.

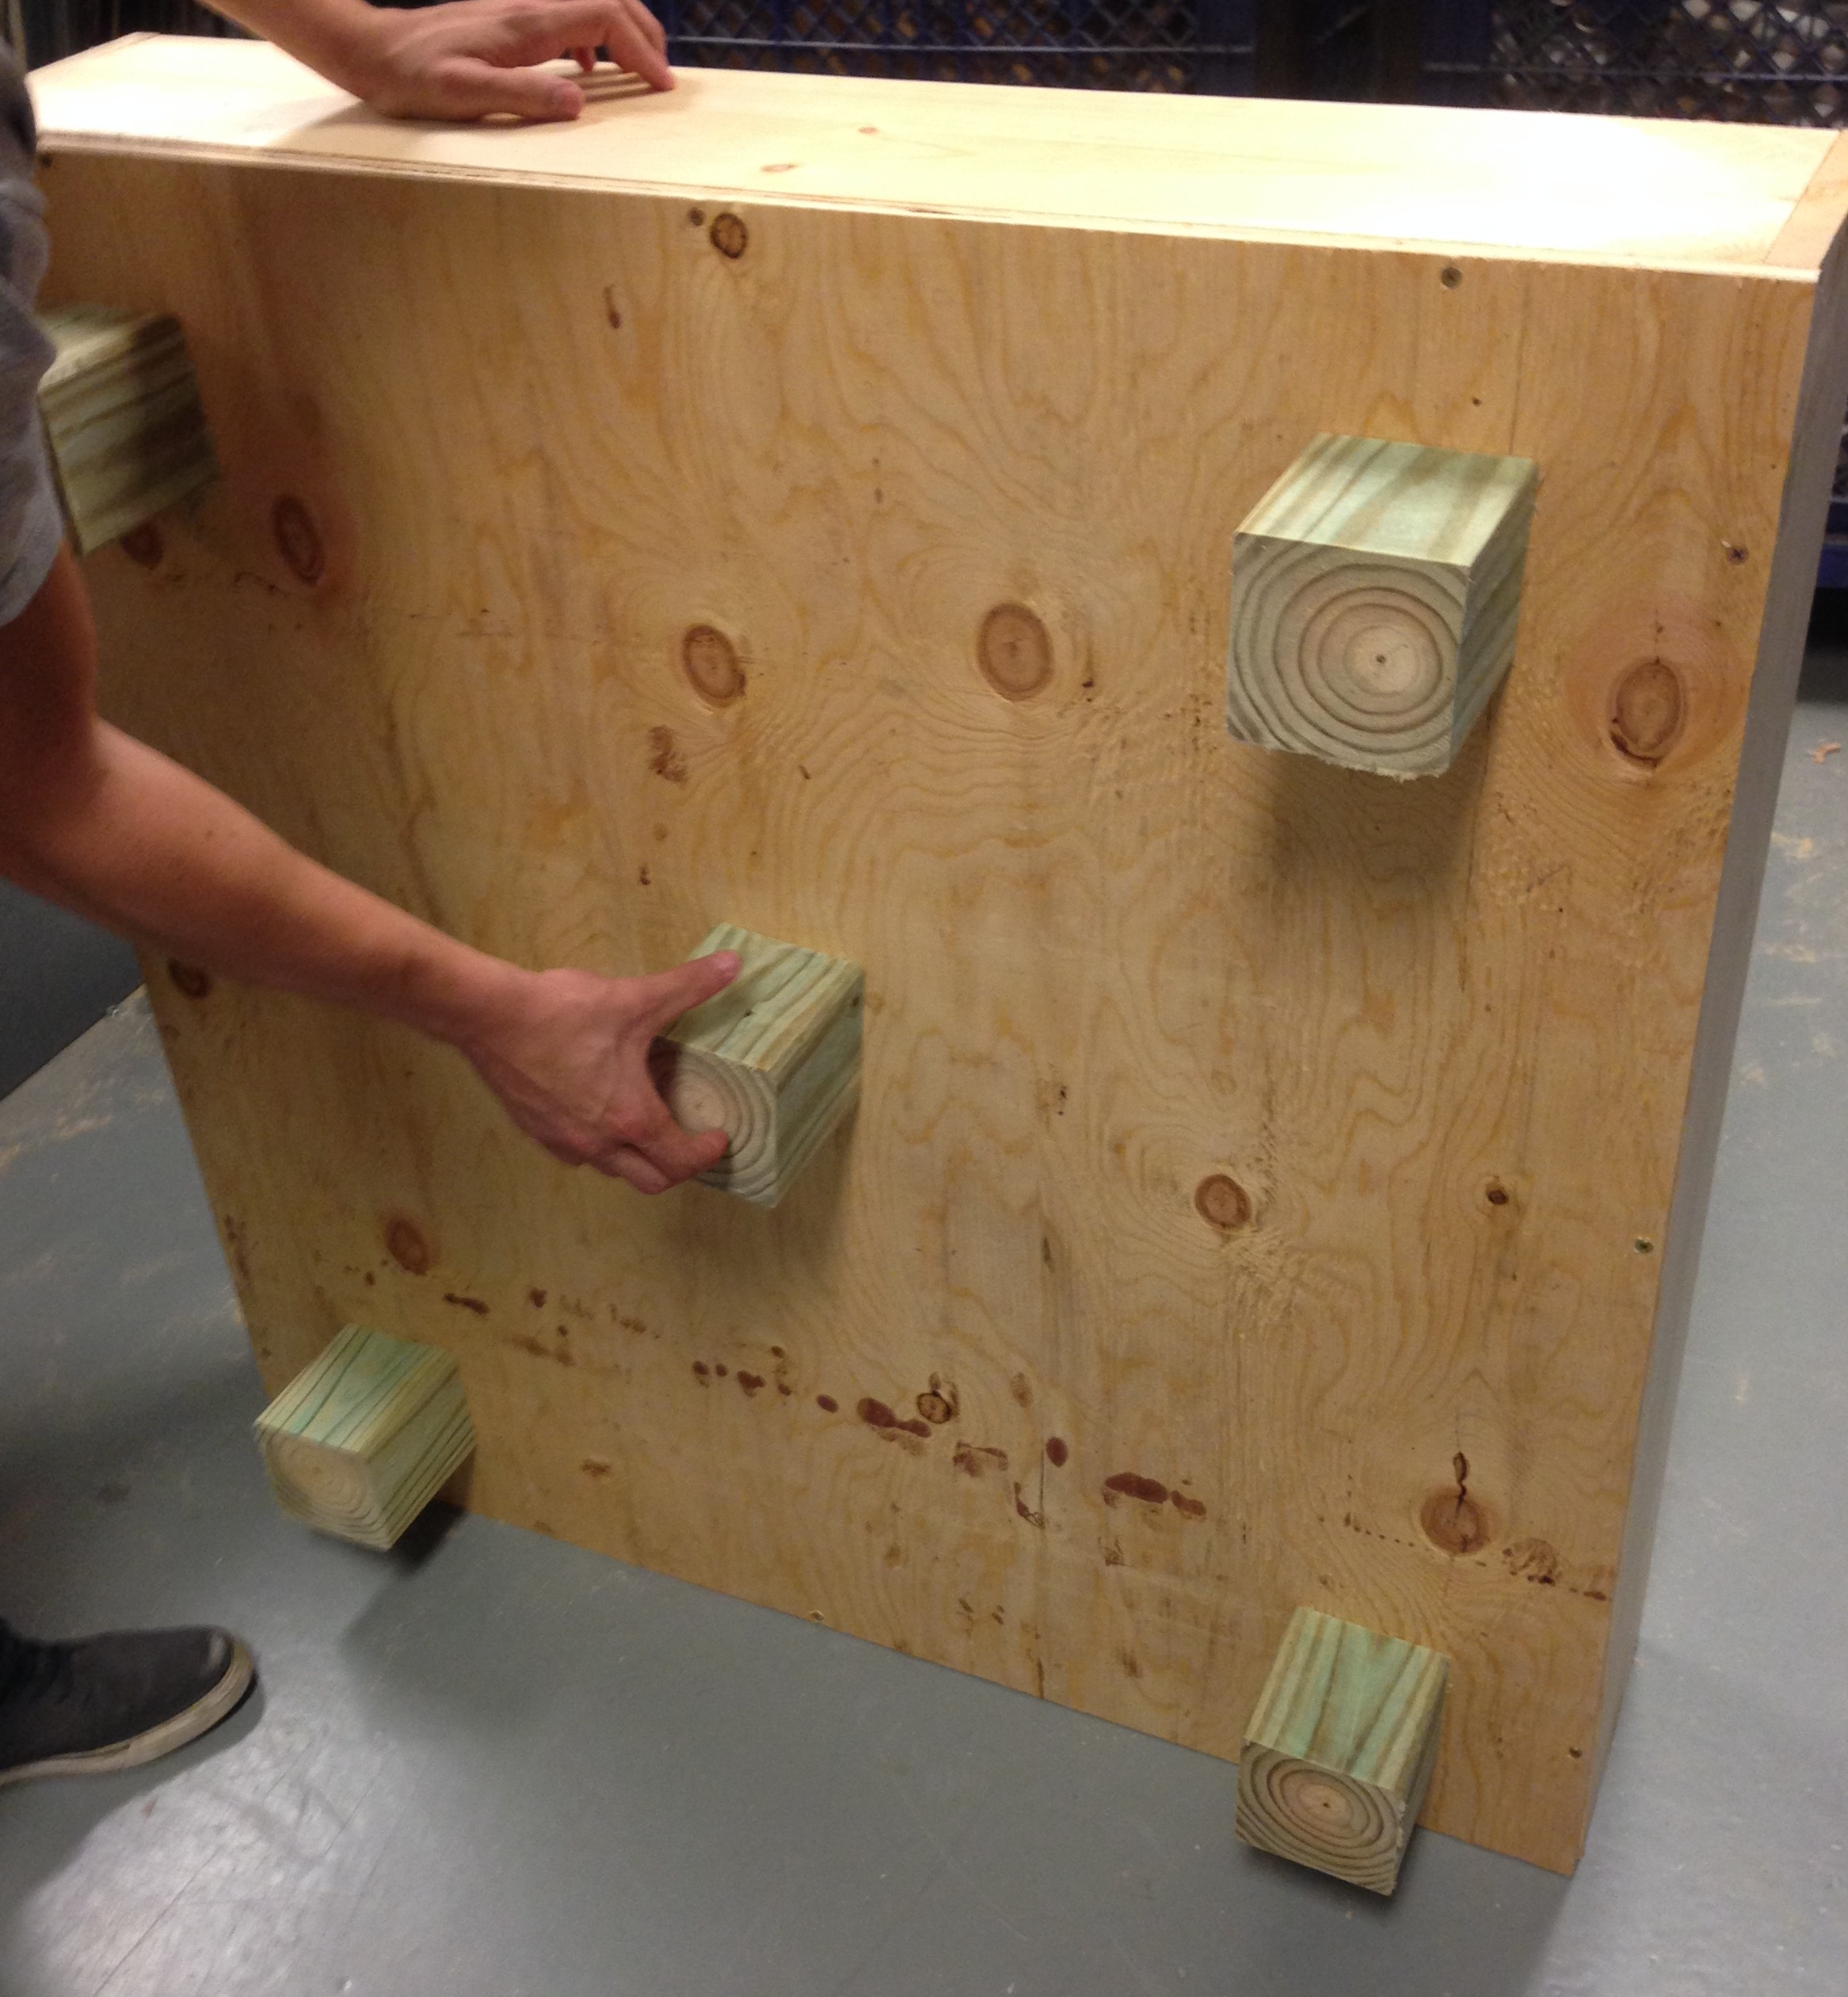
So, for the second prototype we put in corner supports to relieve the stress on the sides. You could use metal corner brackets as well but we chose to go with wooden posts to keep costs down and allow us to use the same screws.


The corner supports were attached to the planters with three screws on one side and two on the other. The support screws (gray screws in the image below) were placed in between the screws that were used to attach the planters’ sides together (gold screws in the image below).

Secure the plywood to the bottom of the planter with three 2” wood screws on each of the four sides.

After the bottoms are secured on the planters it’s time for the legs. Cut the legs from a 4”x4”x8’ pressure treated pine block. Cut the block every 4” so the legs are all the same height.


Place four of the legs a few inches in from each of the four corners and the fifth leg in the middle.
Secure each leg to the bottom of the boxes with the same 2” wood screws. On the inside of the planter, mark the location of the legs, and put two or three screws in through the plywood to secure each leg.

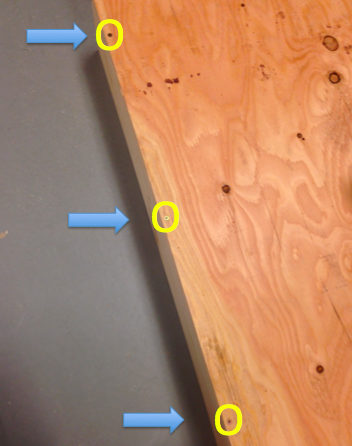
After screwing in all 5 legs for each box you will need to use a ¼ size drill to put holes in the base of the planters to allow water to drain so the boxes (and plants) don’t rot. We drilled the holes in somewhat of a circle with eight holes around the outside and four in the middle. We also drilled two holes on either side of each corner support to help prevent wood rotting.


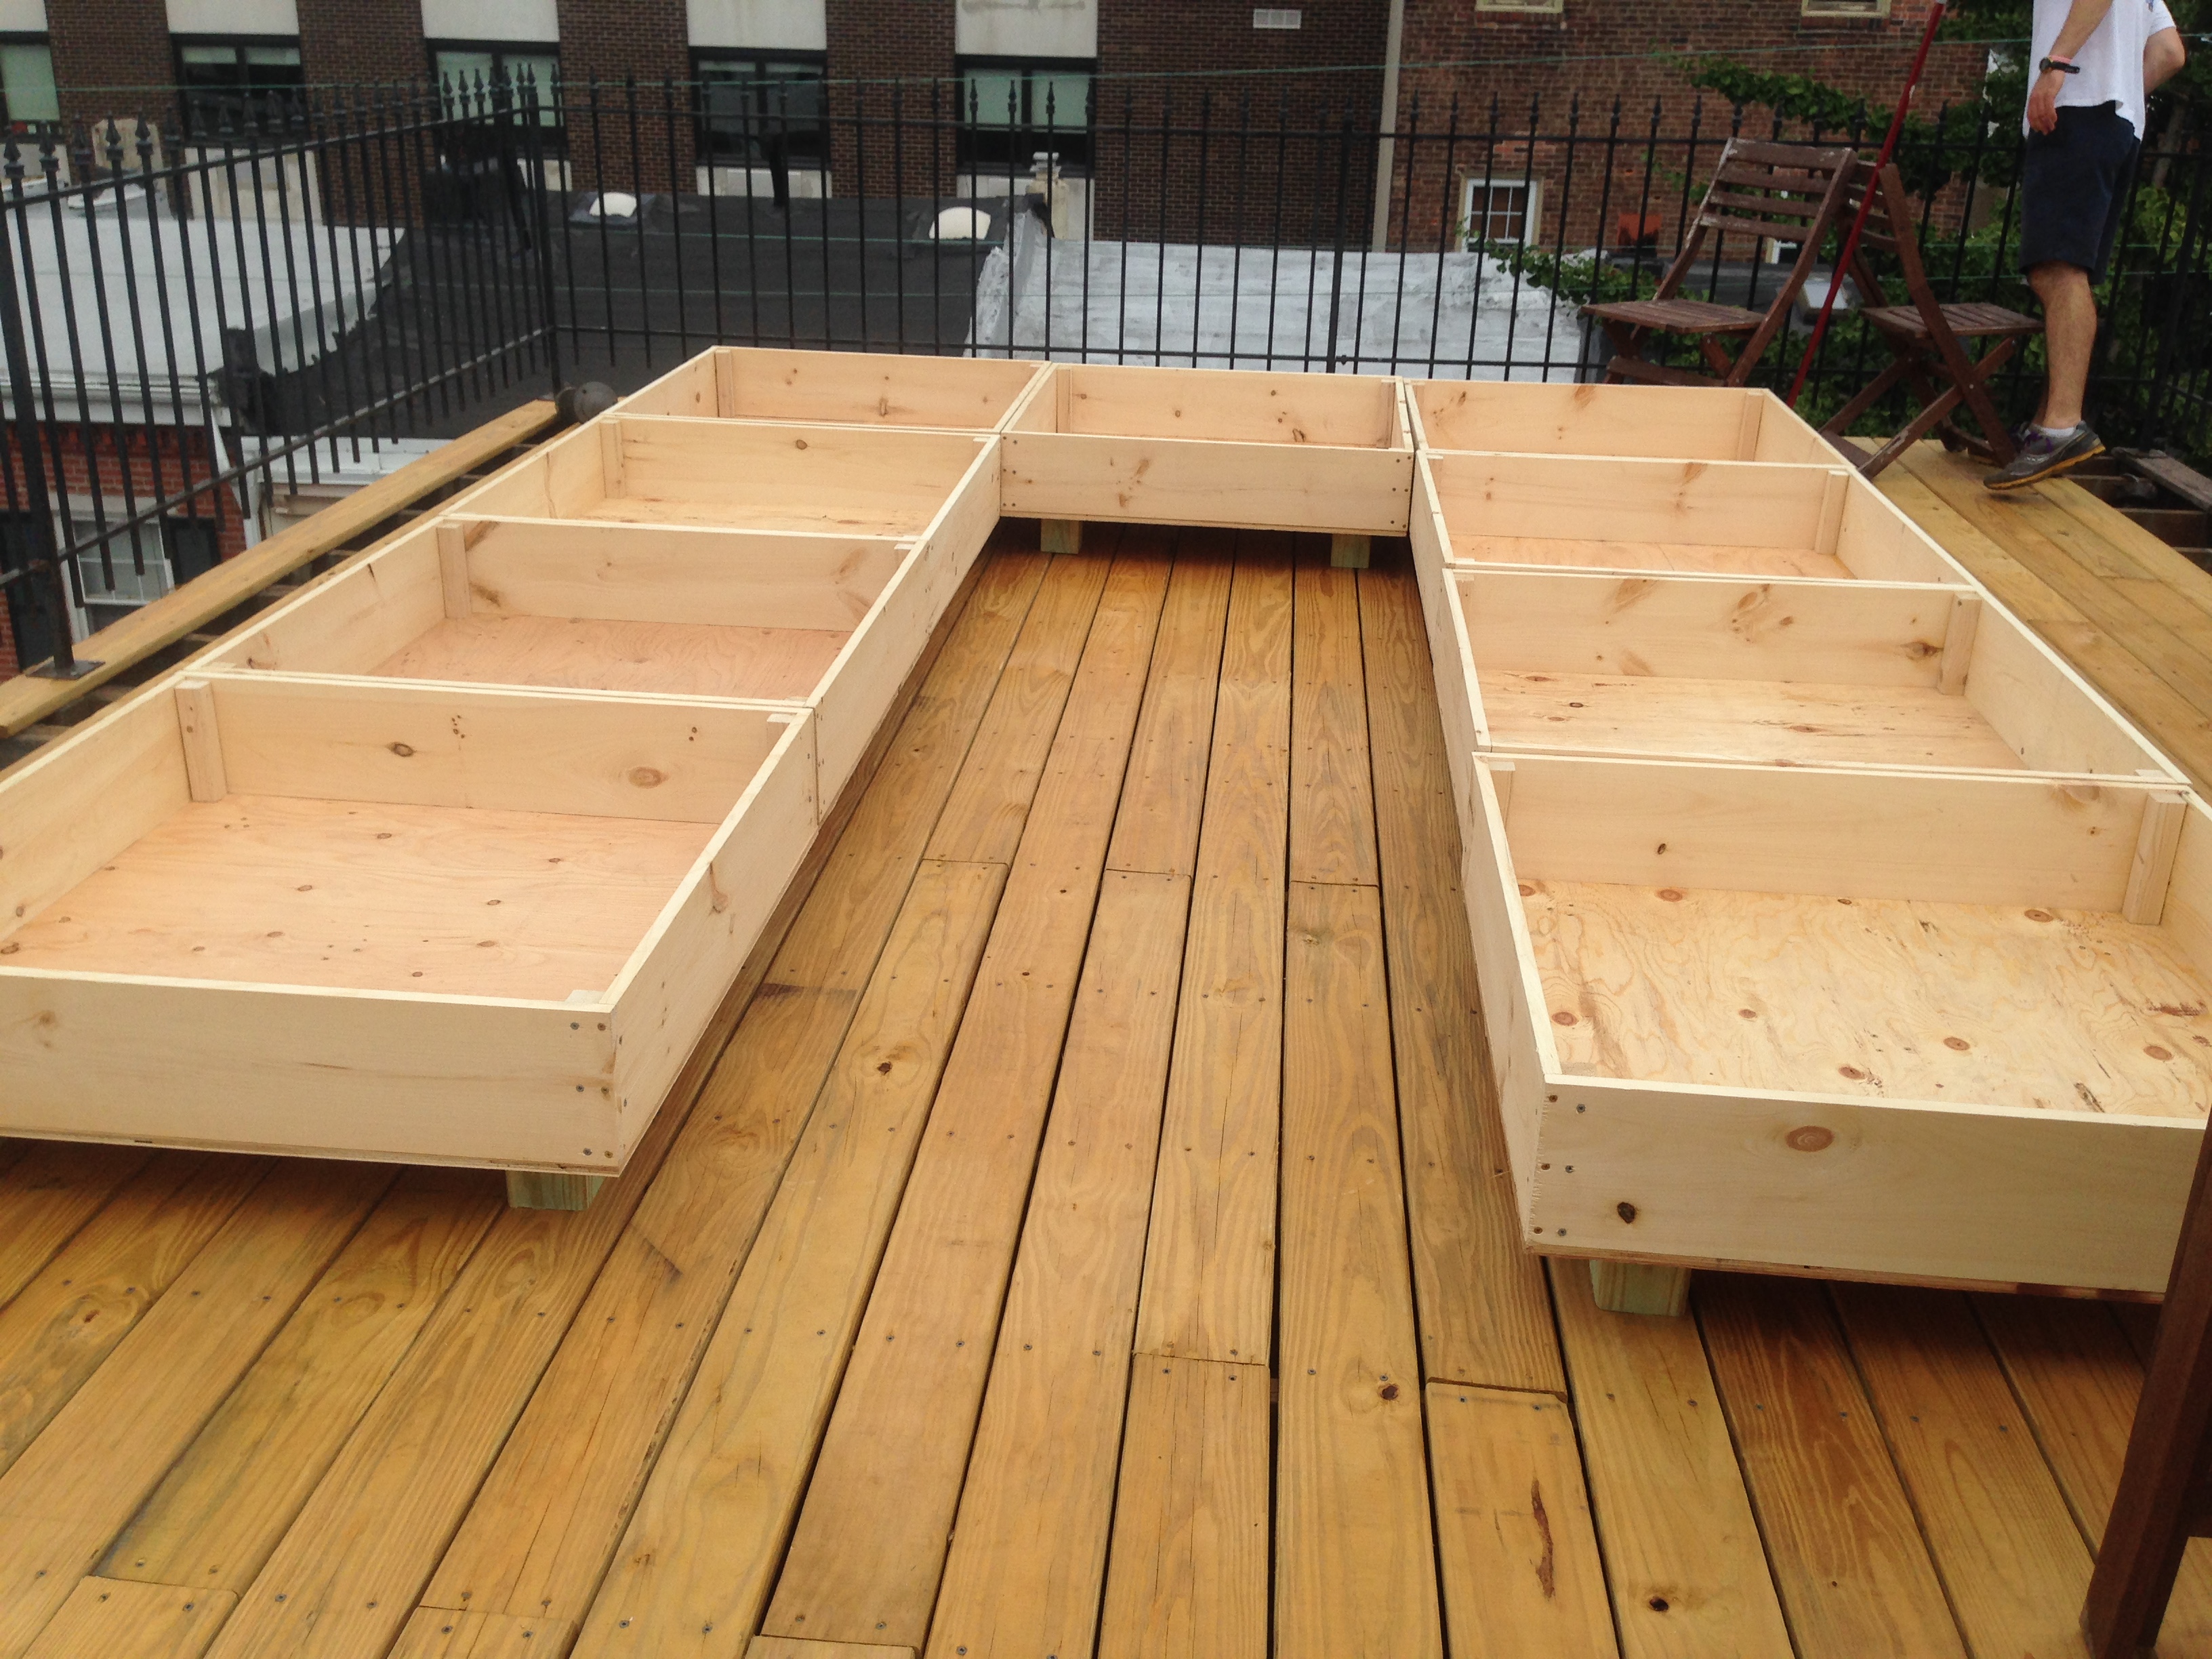
(Finished layout and setup of the planter boxes)

