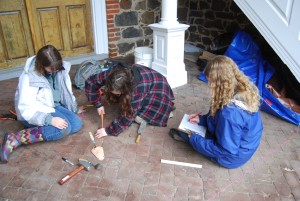
The following blog details the excavation work done on April 10th, 2015.
It had been two weeks since we last saw Old Swedes Church. It was a site for sore eyes when Professor De Cunzo and the class arrived. There was also an air of excitement because there was a lot of work to be done, despite the still-cold weather. Due to the well-timed weather of Delaware, there had been countless push backs on when the teams could actually begin mapping out the units. But On March 27th, mapping actually began. On the 10th, some teams actually began to peel back each layer of their unit, while other teams (new and old) started or finished their mapping.
Originally, there were 3 teams setup to tackle the site, each consisting of four people. As the students split up to do work, it was discovered that four people at each excavation unit (EU) wasn’t entirely necessary. So the three teams, affectionately and with a conservative pinch of imagination, were named: One Team (OT), Another Team (AT), and Yet Another Team (YAT). This changed after March 27th to where one person was picked off each team to form New Team (NT). As you can see, imagination runs wild in this class. But so does determination and an eagerness to begin working. NT, which I am a part of, would be working at the southwest buttress of the south porch. OT would continue its work at the northeast porch, AT at the bell tower and YAT in the southern porch.
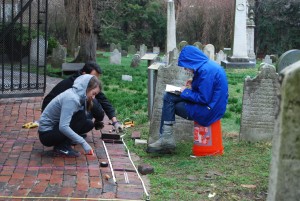
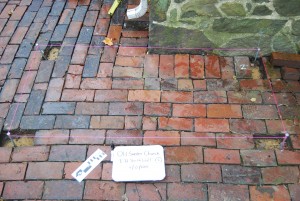
NT, due to its obvious newness, began the mapping process on the 10th. We carefully decided where the borders of our 5 feet by 5 feet unit would be. Once the decision was made, we pulled up bricks that were roughly estimated to be the location of the EU’s corners. After a not so easy time pulling up bricks, which gave us a new appreciation of good masonry work, we used tape measures to properly triangulate the measurements of the EU, and strung up our EU. From there, like our peers on all other units, we prepared 2 measured drawings: one locating our EU on the church perimeter, and a detailed map of the surface brick paving.
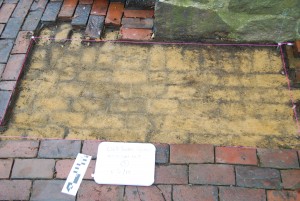
OT is the farthest along with the excavation of three layers: 1) the sidewalk bricks, 2) the linear pattern of sediment that had fallen between the bricks and on the sand beneath, and 3) the masonry sand beneath the bricks. This third layer was said to go ~4 inches deep and led to a layer of gravel, a foundation for the brick paving.
An archaeologist’s job can be rather tedious, and exhaustion or simple tiredness could cause something to be missed. When sifting through their sand, a thought came to light; what if we miss something? Sometimes it’s easy to overlook tiny objects, a shiny thing here or a dull thing there. It is an important reminder that what we do requires vigilance and an astute level of observation, which is probably difficult for some students who may have to forego their ritual of coffee.
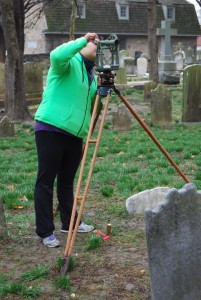
Though it didn’t rain, the mist rolled in and tried to saturate the paperwork and some of the students. AT was one team that was thankful for a lack of rain, as we all were. This team first helped Dr. DeCunzo set up the Transit, a tool used to accurately map locations, and then continued to map out their EU. (One team member in particular was christened in the joys of dealing with the Transit, which is a most excellent teacher of patience.) But the team as a whole continued to map out their EU outside the bell tower’s southern door.
The accuracy of excavating was highlighted with this team. Unlike Indiana Jones, we don’t jump into a location with nothing but our wits and devil-may-care attitude. There is a lot of planning that goes into a site and a lot of tedious measurement taking. But it’s this desire for accuracy that shows just how scientific archaeology really is. It’s not just a bunch of people in boots, shorts, and wide-brimmed fedoras mulling around the dirt with our shovels. (Though our trowels are important part of an archaeologist’s toolkit, especially when removing pesky bricks.)
YAT had a few snares in their mapping. The bricks in the southern porch are laid in a 45° herringbone design. This is a particularly difficult design to take apart because it creates a tight space between the bricks and hardened soil between them. The porch is protected from the weather except from the south and few people enter that area. Most of the bricks are in excellent condition and haven’t been fully affected by the weather, like the bricks that make up the walkway. Because of the unique design of the bricks, YAT was advised to measure all the points on a diagonal and fill in the bricks afterwards. The west side of the EU was done first, so while two members of the team started to excavate the bricks on that end, another finished drawing out the detailed map.
 As the team worked to remove the bricks, they discovered two nails that they included in their artifact find; they were put into brown paper bags and labeled. To those unaware of the goings on of the field, two nails sounds as exciting as watching water boil. But within the field, we know that every piece counts. Each nail, each piece of glass, each object or fragment of object we find has a story to tell. And though we may not be able to get all of their stories, the important thing is to be aware of them.
It is important that each team communicate fully. Ideas should be shared and discussed so that the best work possible can be done for each EU. The reading is extremely important because it gives us theoretical knowledge that can be discussed and applied in the field. As suspected, each site is different, and what works for one may not work for another. Our hope for continued work would be good weather, or at least no rain, and no injuries.

