
Requesting UD Capture in Canvas
-
-
- Request your Canvas course.
- Important: the checkbox option referenced in the next step will not appear on the UD Capture Recording Request Form if you have not created a Canvas course.
- Complete the UD Capture Recording Request Web Form:
- Select “Yes, this term only next to courses you want to use UD Capture.
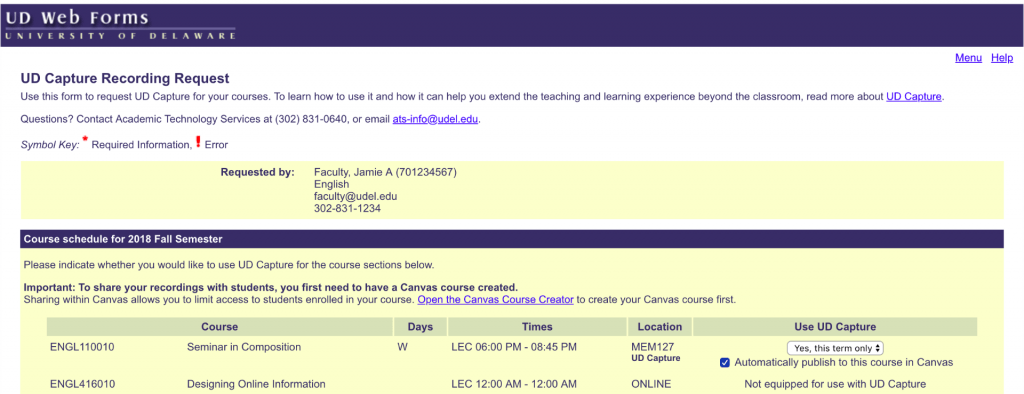
- For each course you selected “Yes, this term only for UD Capture, a checkbox to Automatically publish to this course in Canvas will appear for each course. Check this checkbox to ensure the videos are Published and availableto students automatically.Alternately, if you do not want your UD Capture recordings to be available to students directly, and you would like to edit videos/control what is being shared with students, do not check the checkbox.
- Select “Yes, this term only next to courses you want to use UD Capture.
- When you are ready to access your videos, login to Canvas.
- You will have two new menu options in your Canvas course navigation: My Media and Media Gallery. Click on the My Media menu option.
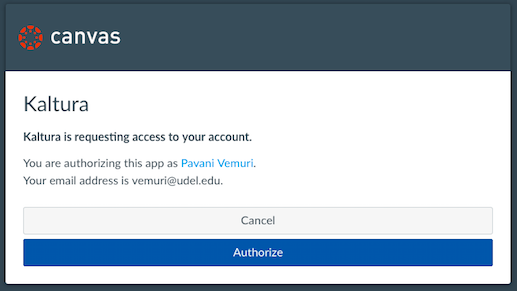
- The first time you click the My Media menu option you will see a message requiring you to authorize “Kaltura, which allows UD Capture, to access your Canvas course. Click the Authorize button.
- Request your Canvas course.
-
-
You should see a list of all your UD Capture recordings (including ones from previous semesters). However, these videos are only accessible to you. You will need to “Publish the recordings and add them to the Media Gallery” in the course to share the recordings with your students.
If you checked the checkbox to Automatically publish this course in Canvas while requesting UD Capture, the current semester videos will show up directly into the Media Gallery and will be accessible to students.